
What are Placements?
A Placement is a UI component that can be embedded directly in your app. Think of it as a designated space where referral interfaces, rewards notifications, or promotional content can appear at strategic moments in the user journey. Placements are:- Dynamic: They can be shown or hidden based on user actions
- Flexible: They can be placed anywhere in your app’s UI
- Controlled: Marketers can activate or deactivate them without code changes
How Checkpoints Trigger Placements
Checkpoints and Placements work together to create a powerful, context-aware user experience:- Checkpoints mark specific moments in the user journey (e.g., completing a purchase, reaching a milestone)
- Placements define the UI components appear in your app
- Campaigns connect checkpoints to placements through the Flock dashboard
By default, calling a checkpoint won’t trigger any UI changes. You need to link checkpoints to placements through Flock Campaign builder.
Implementation
Step 1: Implement Checkpoints in Your App
First, add checkpoints at strategic moments in your user journey using the Flock SDK:Step 2: Link Checkpoints to Placements in the Campaign Builder
Once you’ve implemented checkpoints in your app, you can link them to placements through the Flock Campaign Builder: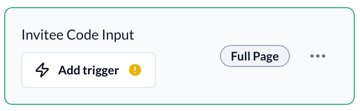
Step 3: Test Your Implementation
To ensure your checkpoints are correctly triggering placements:- Use your Test environment: Always make sure to use your Test environment to verify your setup.
- Trigger Checkpoints: Perform the actions in your app that should trigger checkpoints.
- Verify Placements: Confirm that the correct placements appear at the right moments.
Advanced Configuration
Handling Placement Navigation
When a placement is displayed, you can navigate to different screens within the same modal without closing and reopening it. This provides a seamless user experience, especially for multi-step flows like referral processes.navigate() method is key here - it tells the SDK to navigate within the existing web view instead of creating a new placement. This is particularly useful for:
- Showing success screens after a user completes an action
- Creating multi-step referral flows
- Displaying additional information without disrupting the user experience
When using
navigate(), make sure the destination checkpoint is properly configured in your Flock campaign. The navigation will only work if the checkpoint exists and has content assigned to it.Troubleshooting
If placements aren’t appearing when checkpoints are triggered:- Check SDK Implementation: Ensure you’re correctly calling the checkpoint method
- Verify Campaign Configuration: Confirm that the checkpoint is linked to a placement in an active campaign
- Test Mode: Make sure you’re testing in the correct environment (test vs. production)
- SDK Initialization: Verify that the Flock SDK is properly initialized and the user is identified
- Console Logs: Check your application logs for any SDK errors or warnings